
Effective house layout planning before your first architect consultation involves producing a functional programme brief, a spatial adjacency diagram, a site orientation analysis, and a prioritized room schedule – all before a single billable design hour begins. According to the American Institute of Architects, homeowners who arrive at their first consultation with a clearly documented brief consistently achieve more productive design outcomes, fewer costly mid-design revisions, and stronger alignment between their vision and the final construction drawings. The pre-design planning phase – covering lifestyle mapping, zoning strategy, circulation hierarchy, and rough spatial sketching – is the single most high-leverage investment a homeowner can make before committing to an architect’s fee structure, which typically ranges from 5% to 20% of total construction cost for residential projects.
That fee range matters. For a $400,000 home build, architectural services can represent $20,000 to $80,000 in professional fees. Every hour your architect spends extracting basic information from you – rooms you need, how you live, what connects to what – is billable time spent on work you could have done at the kitchen table with graph paper and a pencil.
This guide gives you a precise, step-by-step framework for completing your house layout planning process independently, so that when you walk into that first consultation, you bring a clear brief, a spatial sketch, and a documented set of requirements rather than a general idea and a Pinterest board. Whether you are building a new home, designing an extension, or undertaking a full renovation, this process applies.
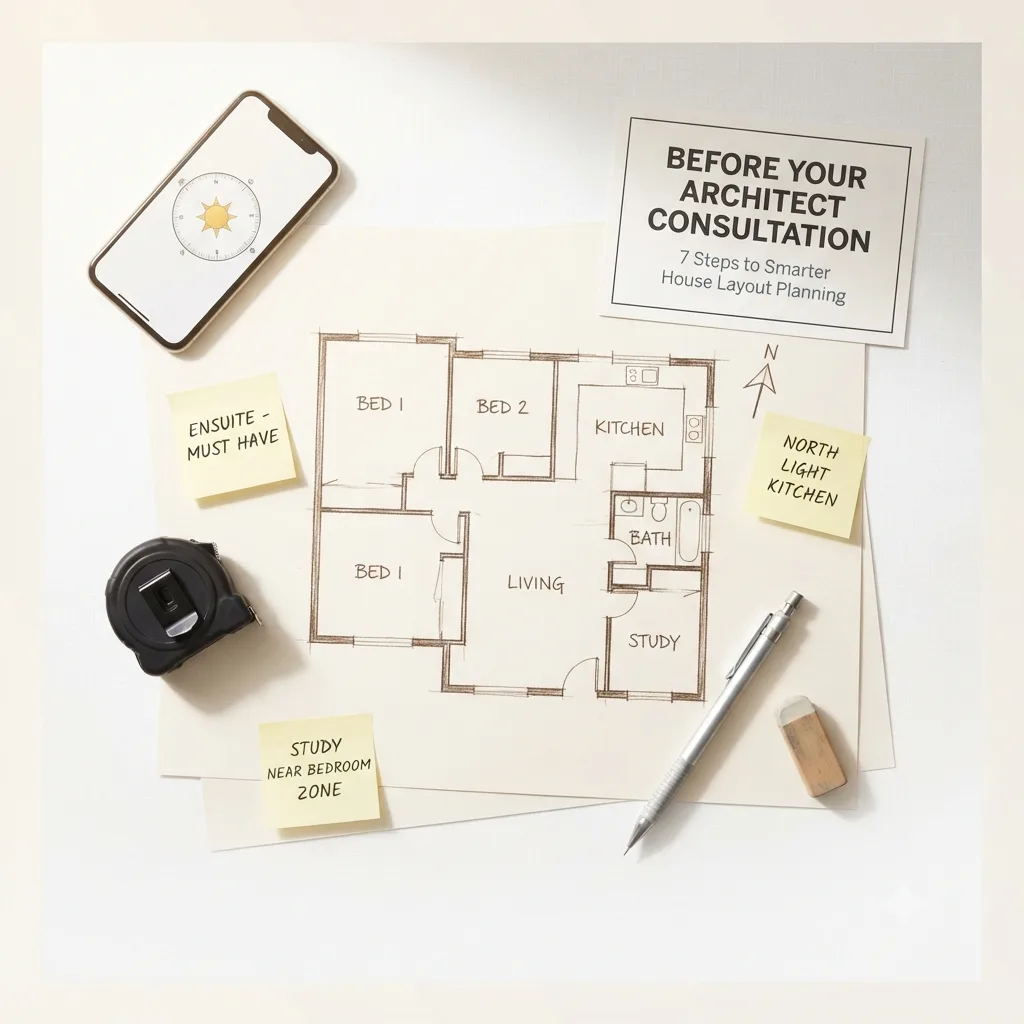
If you want to convert your rough layout sketches into a professionally produced floor plan before your architect meeting, our 2D and 3D floor plan production and conversion services provide exactly that output – turning hand-drawn ideas into scaled, dimensioned drawings your architect can actually work with.
Why House Layout Planning Before the Architect Saves Real Money
Many homeowners assume that layout planning is the architect’s job. That assumption is expensive.
Architects are trained to translate a defined brief into a buildable, code-compliant design. They are not lifestyle analysts or spatial preference surveyors. When you arrive without a clear programme, the architect must generate that information through extended consultation – at their hourly rate.
Consider the compounding effect:
- An architect charging $150 to $250 per hour who spends three additional consultation sessions extracting basic brief information adds $1,350 to $2,250 to your fees before design even begins.
- Mid-design changes to room configuration, circulation paths, or adjacency relationships – changes that arise because requirements were not properly defined upfront – are among the most expensive revisions in the design development phase.
- According to HomeAdvisor’s 2025 residential construction cost analysis, architects typically charge 8% to 15% of total construction costs, and incomplete briefs are one of the most cited drivers of scope creep and fee overruns.
Conversely, arriving with a well-documented spatial brief, a functional diagram, and a prioritized room schedule allows your architect to begin schematic design immediately. The consultation time is spent on creative problem-solving, structural feasibility, and site compliance – the activities you are actually paying professional fees for.
Step 1: Conduct a Lifestyle Audit Before Drawing Anything
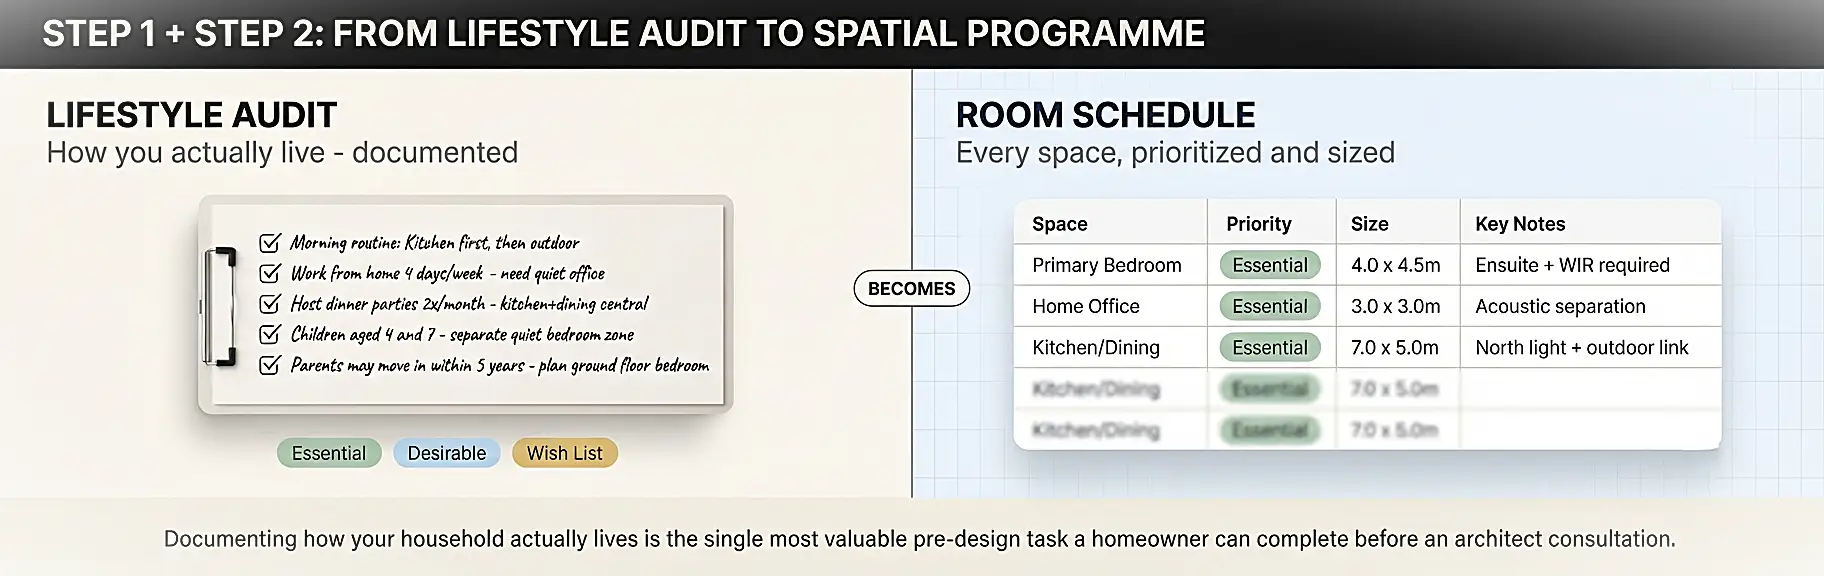
The most productive starting point for any house layout planning process is not drawing rooms – it is documenting how you actually live.
Most layout mistakes happen because homeowners design for an idealized version of their life rather than their actual daily routines. As design professionals at Dreamlands Design note, the most common floor plan error is producing a layout that looks good on paper but fails to match how the household genuinely functions.
Questions to Answer During Your Lifestyle Audit
Work through each of these systematically and record your answers in a document you will bring to your architect meeting:
Morning Routine Flow:
- Where does the household wake up, and where does it go first – bathroom, kitchen, or outdoors?
- Do children and adults share bathroom facilities, or is separation critical?
- Does anyone work from home during the morning, requiring quiet before others leave?
Daily Activity Patterns:
- How many people cook simultaneously, and how important is the kitchen-to-dining relationship?
- Do household members work from home full-time, part-time, or occasionally?
- Are there regular home-based activities: music practice, fitness, crafting, or hobby work?
Social and Entertaining Habits:
- How frequently do you host guests, and at what scale – intimate dinners or large gatherings?
- Do you need a formal living room that is kept tidy for guests, or do you prefer a single open social zone?
- Is guest accommodation a regular requirement, or occasional?
Privacy and Noise Requirements:
- Does anyone in the household need a quiet, acoustically separated workspace?
- Are there young children who nap while other activities continue?
- Is there a teenager or family member who needs a semi-independent zone?
Future Proofing:
- Will the household composition change in the next five to ten years: growing children, aging parents moving in, or downsizing?
- Do you anticipate any accessibility requirements – mobility aids, wider doorways, ground-floor bedroom?
Recording honest answers to these questions before drawing a single line transforms your brief from a wish list into a functional programme. This programme becomes the single most important document you bring to your architect.
Step 2: Build Your Spatial Programme – The Room Schedule
Once you have completed the lifestyle audit, translate it into a formal spatial programme: a structured list of every space your home needs, organized by function, priority, and approximate size requirement.
This is also sometimes called a room schedule. It is the document architects use as the definitive reference for what the building must contain.
How to Structure Your Room Schedule
Use a simple table format. Here is a template framework:
| Space | Priority | Approx. Size | Notes |
|---|---|---|---|
| Primary bedroom | Essential | Min. 4m x 4.5m | Ensuite required; walk-in wardrobe preferred |
| Bedroom 2 | Essential | Min. 3m x 3.5m | Twin beds needed; north light acceptable |
| Bedroom 3 | Essential | Min. 3m x 3m | Can share bathroom; quiet location |
| Study / home office | Essential | Min. 3m x 3m | Acoustic separation from living areas |
| Open kitchen/dining | Essential | Min. 7m x 5m | Connection to outdoor entertaining |
| Formal living | Desirable | Min. 5m x 4m | Separation from play/casual zone |
| Family/casual lounge | Essential | Min. 4m x 4m | Adjacent to kitchen |
| Ensuite bathroom | Essential | Min. 2m x 2.5m | Double vanity preferred |
| Main bathroom | Essential | Min. 2m x 2m | Bath required |
| Laundry | Essential | Min. 2m x 2m | External access preferred |
| Garage | Desirable | Double (6m x 6m) | Internal access to house |
| Outdoor entertaining | Desirable | Min. 4m x 6m | Covered; connects to kitchen/dining |
Key principles for building your room schedule:
- Label every space as “Essential”, “Desirable”, or “Wish list” – this allows your architect to prioritize when the design needs to work within a constrained footprint or budget
- Include minimum size requirements where you have them – a bedroom you know needs to fit a king bed and two wardrobes should be documented, not left for the architect to guess
- Include relationship notes: which rooms absolutely must be adjacent to each other, and which must be separated
- Note any specific technical requirements: north-facing light for a studio, exhaust ventilation for a chemistry workshop, reinforced floor structure for a home gym
A well-structured room schedule is, in practice, the single most time-saving document you can bring to your first architect consultation.
Step 3: Create a Bubble Diagram to Map Spatial Relationships
A bubble diagram – also called an adjacency diagram or relationship diagram – is a freehand sketch that uses circles or ovals to represent spaces and lines to show how those spaces must connect or relate to each other.
It is not a floor plan. It has no scale, no walls, and no precise dimensions. Its only purpose is to capture the spatial logic of your home: which rooms need to be next to each other, which ones need to be separated, and how circulation should flow through the building.
According to architectural education resources at Learn Architecture, bubble diagrams are essential tools in the early stages of residential design because they allow the designer to test spatial relationships before being constrained by geometry or structure.
How to Draw Your Own Bubble Diagram
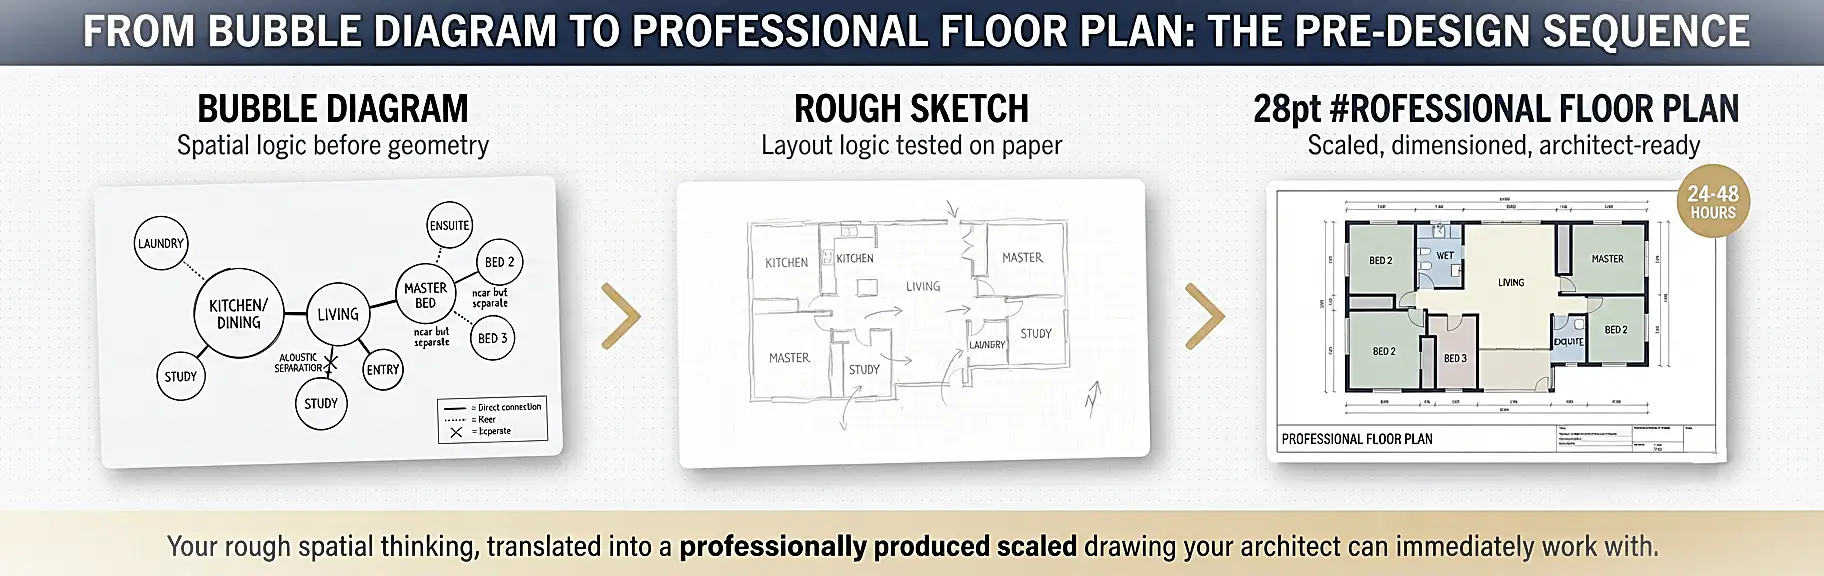
You need nothing more than a blank piece of paper and a pencil.
- Write one room name inside each circle. Use a circle size that roughly reflects the relative importance or size of the space – a large kitchen gets a bigger circle than a powder room.
- Draw lines between circles that must be directly connected. A solid line between “Kitchen” and “Outdoor Entertaining” means they must be directly accessible to each other. A solid line between “Primary Bedroom” and “Ensuite” means they share a direct door.
- Draw dotted lines between circles that should be near each other but not necessarily directly connected. A dotted line between “Home Office” and “Bedroom Zone” means the office should be in the quieter wing of the house, not adjacent to the kitchen.
- Draw a line with a cross through it between circles that should be separated. “Garage” separated from “Main Bedroom” means you do not want vehicle noise close to the sleeping zone.
- Cluster your circles into functional zones: sleeping zone, living zone, service zone, and working zone. This clustering exercise frequently reveals conflicts in your room schedule that need to be resolved before schematic design begins.
- Review the diagram against your lifestyle audit. Does the morning flow make sense? Can the household move from bedroom to kitchen to outdoor area logically? Is the home office acoustically protected from high-traffic zones?
Your bubble diagram does not need to be neat or final. Its value is in forcing you to think through spatial relationships explicitly – work that your architect would otherwise charge you consultation time to extract.
Step 4: Understand Your Site Before Planning Your Layout
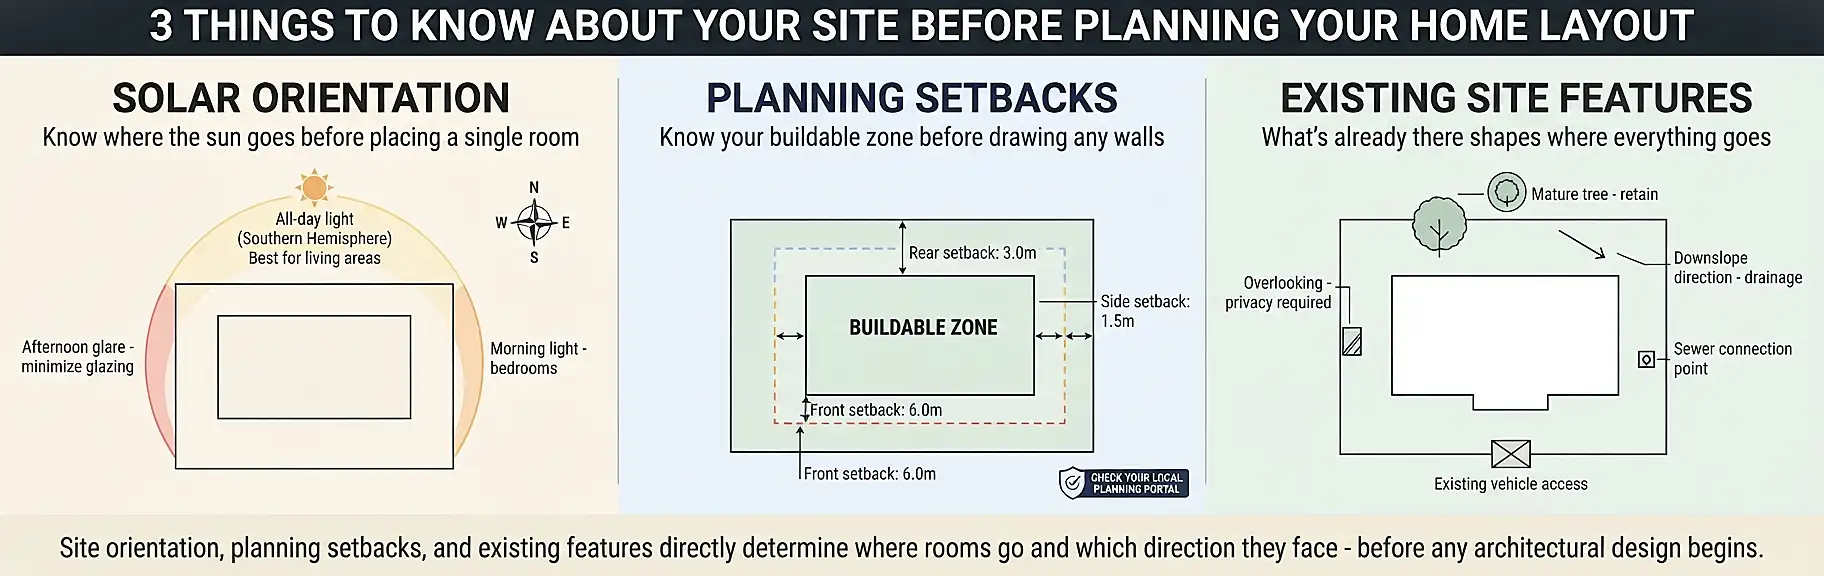
House layout planning cannot happen in a vacuum. The site – its orientation, dimensions, slope, prevailing winds, neighbouring properties, and access points – fundamentally shapes every decision about where rooms go within the building footprint.
Many homeowners spend weeks planning their interior layout without considering the site constraints that will force the architect to redesign everything from scratch in the first consultation. This is one of the most costly planning mistakes you can make.
Key Site Information to Gather Before Your Architect Meeting
Orientation and Solar Access:
- Identify true north on your site. In the northern hemisphere, south-facing rooms receive the most natural light year-round. In the southern hemisphere, north-facing rooms do.
- Note which parts of the site receive morning sun (east), afternoon sun (west), and all-day sun (north in southern hemisphere, south in northern hemisphere).
- This directly determines which rooms should face which direction: bedrooms often benefit from east-facing morning light, living and kitchen areas from north-facing light, and west-facing rooms may overheat in afternoon summer sun.
Site Boundaries and Setback Requirements:
- Every jurisdiction enforces setback regulations that determine how close a building can be built to property boundaries. These setbacks directly constrain where the building footprint can sit within the site.
- Measure your site boundaries and note any existing surveyed boundary dimensions. Your local planning authority or municipality’s zoning portal will document the minimum setback requirements for your site zone.
- As ArchitectGPT’s residential zoning guide explains, understanding setback and zoning constraints before drawing a single wall line is the difference between a viable concept and a design that never gets past the first sketch.
Existing Site Features:
- Note the location of existing trees, significant landscaping, and natural features you want to retain or that restrict building placement.
- Identify the slope direction and approximate gradient of the site. A steeply sloping site fundamentally affects where the building can be located and how levels are configured.
- Note the location of the vehicle access point, street frontage, neighbouring windows that may overlook the site, and any easements or right-of-way constraints.
Utility Connections:
- Record the location of the existing water, sewer, stormwater, gas, and electrical connection points on the site boundary. Building placement that minimizes the distance to these connections reduces infrastructure costs significantly.
Gathering this site information and presenting it to your architect in a structured format – ideally as a simple site diagram with north arrow, boundary dimensions, and key feature annotations – compresses the early consultation phase by weeks.
Step 5: Sketch Your First Rough Layout
With your lifestyle audit, room schedule, bubble diagram, and site information assembled, you are ready to sketch your first rough floor plan layout. This is not a technical drawing. It is a thinking tool.
The goal is to translate your spatial logic diagram into something that begins to look like a plan – a top-down view showing rough room shapes, their relative sizes, and how they connect.
The Rough Sketch Process
Start with the site boundary, not the rooms. Draw a rectangle that represents your building footprint within the available buildable area of your site. Keep it proportional, even if not precisely to scale.
Place the anchor rooms first. Every residential layout has anchor rooms: typically the kitchen and the main living space. These rooms drive all adjacency decisions. Place them in the location that best serves solar orientation and site access requirements.
Build out from the anchor rooms. Add connecting rooms in sequence based on your bubble diagram relationships. The laundry connects to the kitchen zone. The dining connects to both the kitchen and the outdoor space. The master bedroom connects to the ensuite and is separated from the service core.
Block in room proportions, not exact dimensions. You are testing whether rooms can fit together in a logical arrangement, not finalizing their sizes. A rough rectangle labeled “Bedroom 3 – 3x3m approx.” is entirely sufficient at this stage.
Mark circulation paths. Draw lines showing how you would walk from the front door to the kitchen, from the bedroom to the bathroom, from the kitchen to the outdoor entertaining area. Circulation typically consumes 8% to 15% of a floor plan’s total area and is the most commonly overlooked element in self-directed layout planning.
Check it against your lifestyle audit. Walk through a typical morning mentally using your sketch. Does the flow make sense? Does the kitchen feel accessible from the entry? Can someone move from the study to the bathroom without walking through the living room during a meeting?
Doing even two or three iterations of this rough sketching process before your architect consultation dramatically accelerates the design phase. Your architect will use your sketch not as a final layout but as a direct window into your spatial thinking – far more useful than verbal descriptions alone.
You can find examples of professionally produced house plan drawings across a range of residential project types in our house plan drawing samples library – useful reference material when developing your own rough sketch to understand what a scaled residential floor plan contains.
Step 6: Convert Your Sketch to a Professional Pre-Design Floor Plan
A rough hand-drawn sketch is valuable internally, but it has limitations as a communication tool. Architects think in scaled drawings. When you arrive with a rough sketch, the visual information is useful but imprecise.
Converting your rough sketch into a scaled, dimensioned 2D floor plan before the consultation transforms it from a discussion aid into a proper spatial reference document – one your architect can immediately assess for structural feasibility, code compliance review, and schematic design development.
This is precisely where a professional floor plan conversion service adds substantial value for homeowners in the pre-design phase.
The process is straightforward:
- Take clear photos or scan your hand-drawn rough sketches
- Note any approximate room dimensions you have estimated
- Submit the sketches and dimensions to a professional floor plan service
- Receive a scaled, clean 2D floor plan within 24 to 48 hours
- Bring that professional drawing to your architect consultation
The difference this makes in the quality and efficiency of your first architect meeting is significant. Instead of your architect spending the first hour decoding a rough sketch, they can immediately evaluate the spatial logic, identify structural implications, and begin exploring design alternatives – all against a clear, professionally drawn reference.
Our sketch to professional floor plan service is specifically designed for this pre-design workflow, and our detailed guide on the rough sketch to professional floor plan conversion process explains exactly what the process involves and what inputs you need to provide.
Step 7: Prepare Your Architect Brief Document
Your architect brief is the written document that accompanies your spatial sketch and room schedule. It is the definitive reference for your project requirements and should be prepared before your first consultation.
What Your Architect Brief Should Include
Project Overview:
- Brief description of the project: new build, extension, or full renovation
- Site address and site area
- Target number of storeys
- Total approximate floor area target
- Any relevant planning overlay or heritage controls
Household and Lifestyle:
- Number and ages of household members
- Work-from-home arrangements
- Specific lifestyle requirements documented from your lifestyle audit
- Pet requirements (dog door, outdoor access, etc.)
Spatial Programme:
- Your completed room schedule (from Step 2)
- Your bubble diagram (from Step 3)
- Your rough sketch (from Steps 5 and 6)
Design Preferences:
- Architectural style references: 3 to 5 images that represent what you are drawn to, and 3 to 5 images that represent what you want to avoid
- Interior character references: open plan versus defined rooms, light and airy versus warm and intimate
- Material preferences where you have them: stone, timber, render, brick, glass
Budget:
- Your total project budget including construction, professional fees, landscaping, and contingency
- Your hard upper limit, clearly stated
- Priority areas where budget should be concentrated
Programme and Timeline:
- When you need to be in occupation
- Any hard deadline constraints: school year, lease expiry, family event
- Flexibility in the programme if the design process takes longer than anticipated
The American Institute of Architects emphasizes in its homeowner consultation guidance that the quality of the outcome is directly proportional to the quality of the information the owner brings to the process. A clear, written brief is the most powerful tool a homeowner has in any architect consultation.
House Layout Planning: The Pre-Design Checklist
Use this checklist to confirm you have completed all pre-design preparation before your architect meeting:
Lifestyle and Programme:
- Lifestyle audit completed and documented
- All household members consulted about their requirements
- Future needs (5 to 10 years) considered
- Must-have, desirable, and wish-list items separated
Spatial Documentation:
- Room schedule completed with priority ratings and approximate sizes
- Bubble diagram drawn showing all required adjacencies and separations
- Rough floor plan sketch completed (at least two iterations)
- Professional scaled floor plan produced from sketch (if possible)
Site Information:
- Site dimensions and boundary survey obtained
- True north and solar orientation documented
- Local setback and zoning requirements confirmed
- Existing site features (trees, slope, drainage) noted
- Utility connection point locations identified
Design and Budget:
- Style reference images collected (like and dislike)
- Total budget range clearly established
- Priority areas within the budget identified
- Timeline and occupation target confirmed
Brief Document:
- All above information compiled into a single written brief document
- Brief reviewed by all household members for consensus
Common House Layout Planning Mistakes to Avoid
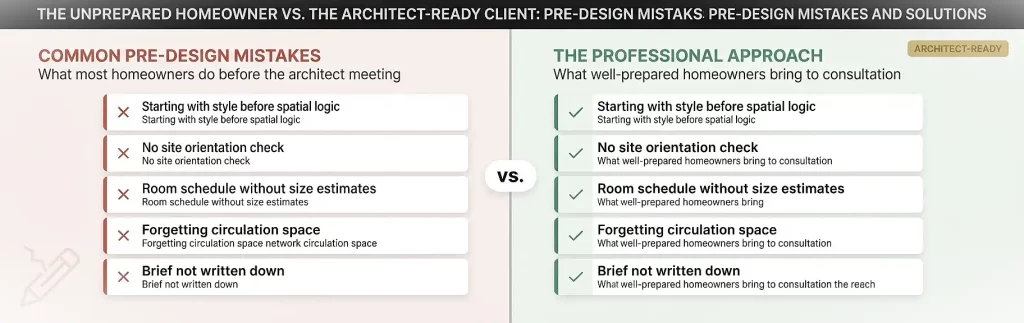
Mistake 1: Beginning With Style References Instead of Spatial Logic
Collecting images of kitchens and bathrooms before defining how many bedrooms you need, how they connect, and where the house sits on the site is the most widespread planning sequence error. Style decisions should follow spatial decisions, not precede them. Start with function, then layer aesthetics on top.
Mistake 2: Planning the Layout Without Considering the Site Orientation
A house designed in isolation from its site will always compromise on natural light, ventilation, and outdoor connection. The orientation of your site directly determines which rooms should face which direction. Designing a north-facing kitchen on a south-facing site before the architect reviews solar access results in fundamental layout changes at schematic design stage – and billable rework time.
Mistake 3: Ignoring Circulation When Sizing Rooms
Circulation paths – hallways, entries, landing areas, and the space needed to move between rooms – consume between 8% and 15% of your total floor area. Many homeowners allocate space to rooms and then discover there is no area left for the hallway connecting them. Always include circulation in your rough sketch from the first iteration.
Mistake 4: Designing Only for Today’s Household
A home designed for two adults that does not anticipate a growing family, elderly parent accommodation, or accessibility requirements will be functionally obsolete within five years of completion. Consult every potential future household member and document requirements that may not be immediately relevant but need to be accommodated in the spatial structure.
Mistake 5: Not Establishing a Hard Budget Limit Before Layout Planning
The size of a house – the total floor area across all rooms – directly determines construction cost. Many homeowners produce a room schedule that implies a 350 square metre house when their budget supports 220 square metres. Arriving at an architect consultation with an over-programmed brief wastes consultation time on a design that will need to be stripped back. Establish your total area budget, roughly allocate square metres to rooms, and check it against construction cost benchmarks before the meeting.
Mistake 6: Treating the Rough Sketch as Permanent
The rough sketch you produce in Step 5 is a thinking tool, not a design commitment. Many homeowners become emotionally attached to their self-drawn layout and resist the architect’s structural, code-compliance, or spatial improvements. The sketch’s role is to communicate your spatial logic and priorities to the architect – the architect’s role is to make it better.
Mistake 7: Forgetting Service Spaces
Laundries, pantries, linen closets, hot water systems, electrical meter boards, and waste collection areas are consistently omitted from homeowner room schedules. Every one of these service spaces takes physical area and needs a logical location in the plan. Forgetting them means the architect discovers they have no location in schematic design, requiring layout changes.
Expert Tips: Getting Maximum Value From Your Architect Consultation
Tip 1: Bring Three Versions of Your Budget
Prepare a base budget (the minimum you can afford), a target budget (what you are comfortable spending), and a stretch budget (the absolute maximum). This gives your architect the flexibility to explore design options at different scales without needing to renegotiate the scope of the consultation.
Tip 2: Walk Your Site at Different Times of Day Before the Meeting
Visit your site in the early morning, at midday, and in the late afternoon. Note where the sun is, which areas are shaded by neighbouring buildings or trees, where wind is noticeable, and what views are available from different positions. This direct observation is far more useful to your architect than a site plan alone.
Tip 3: Test Your Room Schedule Against Real Furniture
Before finalizing your room schedule, check your minimum room sizes against actual furniture dimensions. A bedroom that “should” accommodate a king bed plus two bedside tables plus a wardrobe requires a minimum of approximately 4m x 4.5m in most configurations. Testing minimum sizes against furniture prevents the common error of specifying rooms that are technically present but functionally inadequate.
Tip 4: Document What You Dislike About Your Current Home
One of the most valuable questions in an architectural brief is: “What does your current home fail to do?” Specific, concrete examples of what does not work in your existing space – the kitchen that has no connection to the outdoor area, the bedroom that faces a neighbour’s window, the bathroom that is too far from the children’s bedrooms – give your architect precise problems to solve rather than abstract aspirations to interpret.
Tip 5: Quantify Your Storage Requirements
Storage is consistently underestimated in homeowner briefs and overrepresented in post-occupancy complaints. Walk through every room of your current home and list what needs to be stored in each space. Bring this inventory to your architect consultation. “We need a kitchen pantry capable of storing a year’s worth of bulk dry goods, a wine cellar, and a dedicated appliance cupboard” is a brief. “We need good storage” is not.
Tip 6: Consider Upgrading Your Sketch to a 3D Floor Plan
Once you have a rough sketch that you are relatively satisfied with, converting it to a 3D floor plan before the architect meeting gives you and your architect a far more intuitive reference point than a 2D drawing. A 3D floor plan shows room character, spatial flow, and the experience of moving through spaces in a way that a flat plan cannot communicate. Our guide on what a 3D floor plan contains and how it is produced is a useful starting reference for understanding what this format delivers.
Understanding the Difference Between Your Pre-Design Sketch and a Formal Floor Plan
Many homeowners confuse the rough sketch they produce during house layout planning with the floor plans their architect will produce as formal construction documents. These are fundamentally different documents.
| Attribute | Homeowner Pre-Design Sketch | Architect’s Floor Plan |
|---|---|---|
| Purpose | Communicate spatial logic and preferences | Define buildable geometry for construction |
| Scale | Approximate or notional | Precisely scaled (1:50 or 1:100 typically) |
| Dimensions | Estimated or absent | Exact, surveyed, and code-compliant |
| Code compliance | Not required | Mandatory |
| Wall types | Not differentiated | Structural vs. non-structural, material specified |
| Door and window schedules | Not included | Fully specified |
| Structural elements | Not shown | Beams, columns, and load paths shown |
| Produced by | Homeowner | Registered architect or architectural technologist |
| Legal status | None | Required for building permit applications |
Understanding this distinction prevents the frustration of homeowners who expect their pre-design sketch to be directly “finished” by the architect without significant development. Your sketch is an input to the design process, not a near-final document.
For homeowners who want a professionally produced reference drawing that bridges the gap between a rough sketch and a formal architectural floor plan – without committing to full architectural fees – our 2D floor plan with dimensions service produces exactly this document type.
Frequently Asked Questions
What is house layout planning and why should I do it before seeing an architect?
House layout planning is the pre-design process of documenting your lifestyle requirements, mapping spatial relationships between rooms, understanding site constraints, and producing a rough spatial sketch before engaging an architect. Doing this work before your first consultation reduces the time your architect needs to extract brief information, minimizes expensive mid-design revisions, and produces better outcomes because the architect can focus their expertise on design problem-solving rather than needs assessment.
How detailed should my sketch be before the architect meeting?
Your pre-design sketch does not need to be technically precise or to scale. It should clearly show: the approximate size relationship between rooms, which rooms connect directly to each other, the intended location of the house on the site relative to north, and the primary circulation paths. A sketch drawn on graph paper at a rough scale of 1 square = 1 metre is entirely adequate. The goal is to communicate spatial logic, not to produce a construction drawing.
How much time does pre-design planning save in architect fees?
The time savings vary by project, but most architectural professionals report that clients with well-prepared briefs reach design sign-off 20% to 40% faster than those without one. At architectural hourly rates of $150 to $250, reducing the consultation and schematic design phase by even five hours represents $750 to $1,250 in direct fee savings. For larger, more complex projects, the savings are proportionally larger.
Should I convert my sketch to a professional floor plan before the architect meeting?
Yes, where possible. A professionally produced, scaled 2D floor plan is a significantly more useful consultation document than a rough hand-drawn sketch. It gives your architect a precise spatial reference against which to assess structural feasibility, code compliance, and design opportunities. The cost of a professional floor plan conversion from a sketch is modest relative to the architect fee savings it generates.
What site information is most important for house layout planning?
The most critical site information for layout planning is: the site dimensions and boundary survey, the true north orientation, local zoning setback requirements, the location of the vehicle access point, the slope and drainage direction of the site, and the location of existing utility connection points. This information directly constrains where the building can be placed and which rooms should face which direction for optimal solar access.
What is a bubble diagram and how do I create one for my house layout?
A bubble diagram is a freehand sketch that uses labelled circles to represent rooms and lines to show required adjacencies and separations between them. To create one: write each room name in a circle, draw solid lines between rooms that must directly connect, draw dotted lines between rooms that should be near each other, and mark separations between rooms that must not be adjacent. Cluster rooms into functional zones – sleeping, living, service, and work – and review the result against your lifestyle audit to confirm it reflects how you actually live.
Can I do my own house layout planning without any design experience?
Yes. The pre-design planning process described in this guide requires no architectural training or drawing skill. A lifestyle audit, a room schedule, and a bubble diagram can all be produced at the kitchen table with a pen and paper. The rough sketch phase benefits from basic geometric discipline – keeping lines roughly straight and proportions roughly correct – but technical precision is not required. The value lies in the thinking the process forces you to do, not in the quality of the drawings.
What is the difference between a floor plan sketch and a formal architectural floor plan?
A homeowner’s pre-design sketch is a rough spatial reference document that communicates layout preferences, room relationships, and approximate sizes. It has no legal status, is not drawn to precise scale, and does not include structural information. A formal architectural floor plan is a legally referenced, precisely scaled, code-compliant technical drawing produced by a registered architect or architectural technologist for building permit applications and construction documentation. The sketch is an input to the design process; the architectural floor plan is an output of it.
How do I estimate room sizes for my room schedule without architectural experience?
The most reliable method is to measure the rooms in your current home and use those measurements as a baseline. If a room is too small in your current home, note the minimum size you would need. If a room works well, record its dimensions as your target.
As a general reference guide for standard Australian and North American residential design benchmarks:
| Room | Minimum Functional Size | Comfortable Target Size |
|---|---|---|
| Primary bedroom (queen) | 3.6m x 4.0m | 4.0m x 4.5m |
| Primary bedroom (king) | 4.0m x 4.5m | 4.5m x 5.0m |
| Secondary bedroom (double) | 3.0m x 3.5m | 3.5m x 4.0m |
| Secondary bedroom (single) | 2.7m x 3.0m | 3.0m x 3.5m |
| Ensuite bathroom | 1.8m x 2.4m | 2.0m x 2.8m |
| Main bathroom (with bath) | 2.0m x 2.8m | 2.2m x 3.2m |
| Kitchen (galley) | 2.4m x 4.0m | 2.7m x 5.0m |
| Kitchen (L-shape or island) | 4.0m x 4.5m | 4.5m x 5.5m |
| Living/lounge room | 4.0m x 5.0m | 5.0m x 6.0m |
| Dining room (6 seats) | 3.0m x 3.5m | 3.5m x 4.0m |
| Home office (single desk) | 2.4m x 2.7m | 3.0m x 3.5m |
| Laundry | 1.8m x 2.0m | 2.0m x 2.5m |
| Single garage | 3.0m x 5.5m | 3.5m x 6.0m |
| Double garage | 5.5m x 5.5m | 6.0m x 6.5m |
These benchmarks are starting points only. Your lifestyle audit may reveal that a specific room needs to be larger than the standard size – a kitchen designed for two people who cook simultaneously and host regular dinner parties, for instance, will need to exceed the standard minimum significantly.
Do I need to understand zoning laws and building codes before meeting my architect?
You do not need a detailed understanding of building codes – that is your architect’s expertise. However, you do need to know two things before your consultation: the zoning classification of your site (which determines what type and scale of building is permitted), and the minimum setback distances required from each boundary. Both pieces of information are available free of charge from your local planning authority or municipal zoning portal, typically within 15 minutes of searching. Arriving without this basic site compliance knowledge means your architect must obtain it during the consultation – at your cost.
What is the most important thing to bring to a first architect meeting?
Architectural professionals consistently cite the same answer: a written brief. More specifically, a document that states what you need (your room schedule), how you live (your lifestyle audit), what constraints apply (your site information and budget), and what your priorities are when trade-offs become necessary. Visual references – images of architecture you admire – are useful but secondary to a well-written spatial and functional brief. The AIA’s homeowner consultation guidance at aia.org emphasizes that the homeowner’s ability to clearly communicate vision, functional needs, and budget is the primary driver of project success.
House Layout Planning: What Comes After the Architect Meeting
Understanding what happens after your first architect consultation helps you prepare for the full design journey.
Phase 1: Schematic Design
Your architect takes your brief, sketch, and site information and produces initial schematic design concepts – typically two to three alternative layout approaches that respond to your brief in different ways. This phase benefits enormously from a well-prepared brief because the architect can move directly to creative exploration rather than basic brief extraction.
Phase 2: Design Development
One schematic option is selected and developed in greater detail. Room dimensions are confirmed, structural systems are preliminarily designed, and the design is tested against planning and building code requirements. Your pre-design room schedule and size benchmarks are directly referenced against the evolving plan during this phase.
Phase 3: Construction Documentation
The developed design is translated into full technical drawings and specifications for building permit application and contractor tendering. This phase produces the formally scaled, code-compliant floor plans, elevation drawings, and construction details that your builder will work from.
Phase 4: Planning and Building Permit Approvals
The construction documentation set is submitted to your local planning authority for approval. Elevation drawings – which show the external faces of the building and verify height and setback compliance – are a key component of this submission. Our guide on how elevation drawings differ from floor plans explains how these different document types function within the overall approval process.
Phase 5: Construction
Your architect provides contract administration during construction, reviewing progress against the approved drawings, assessing variations, and certifying progress payments. The quality and precision of the pre-construction documentation set – which traces directly back to the quality of the original brief – determines how smoothly this phase runs.
Understanding this full sequence clarifies where your pre-design planning work sits: it is the foundation on which every subsequent phase is built. Investing seriously in the pre-design phase is not preliminary work – it is the work that makes all subsequent work more efficient, more accurate, and less expensive.
House Layout Planning Is the Work That Makes Architecture Better
House layout planning – done properly before your first architect meeting – is not a preliminary exercise you rush through on your way to the “real” work of design. It is the foundational layer that determines how productive, how accurate, and how cost-effective every subsequent design phase will be.
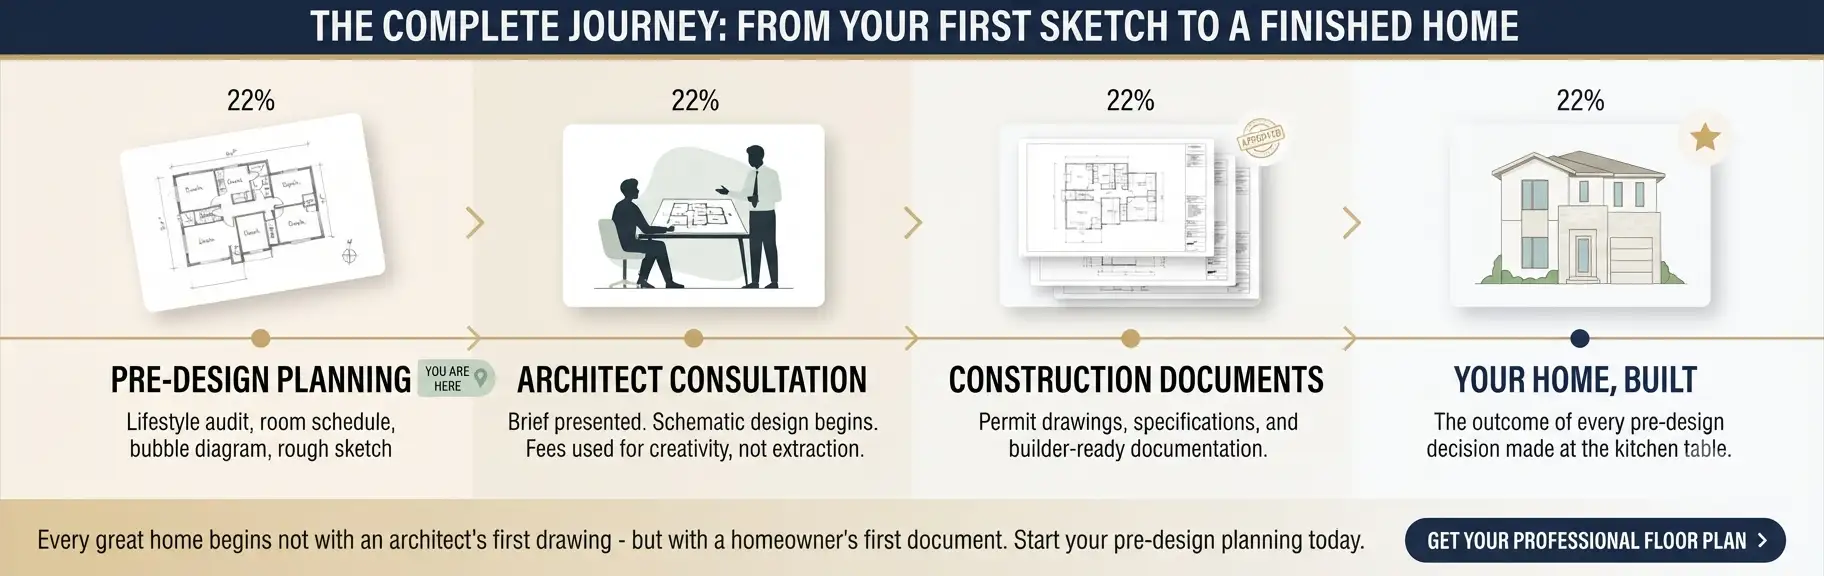
The seven steps in this guide – from the lifestyle audit through to the complete written brief – represent the thinking that the best residential architecture always begins with. Architects who receive well-prepared clients design better buildings in less time. Clients who arrive well-prepared get more design creativity for their fee budget, fewer revision cycles, and a stronger final outcome.
The path from a rough sketch on the kitchen table to a formally permitted, professionally designed home is shorter than most people believe. And it starts not with the architect’s first drawing, but with yours.
Ready to turn your rough layout sketches and pre-design ideas into professionally produced, scaled floor plans your architect can immediately work with? Commission your professional 2D or 3D floor plan drawings today – and explore our transparent floor plan production pricing to understand exactly what your pre-design investment delivers before your first architectural consultation.